01 Sep Taking Stock of Making Stock
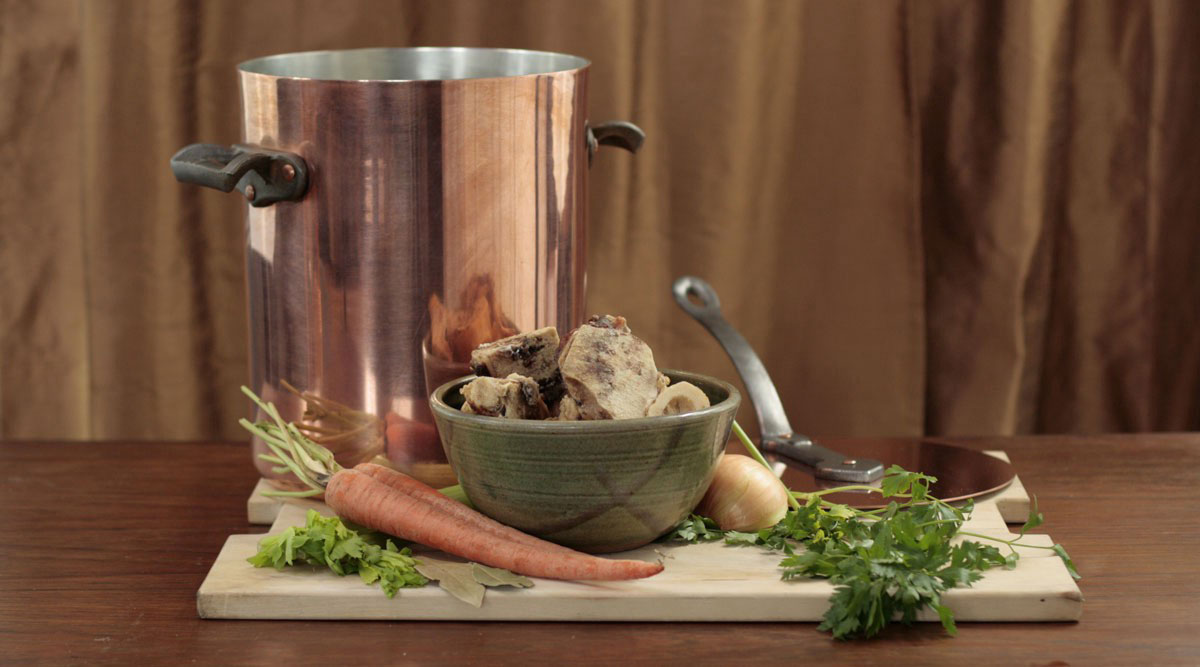
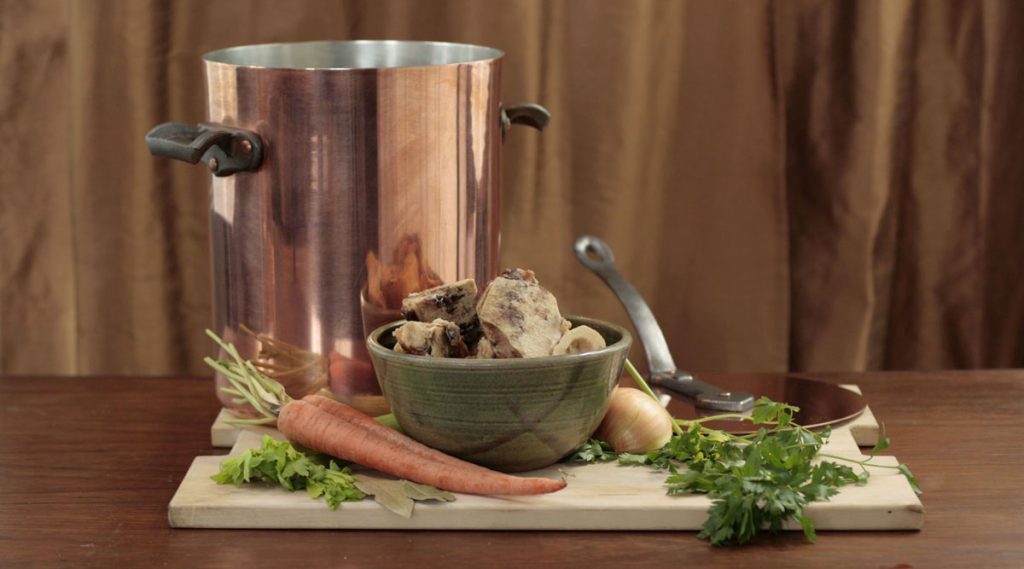 Let’s talk a bit about what goes in and what goes on inside the trophy piece that is the Brooklyn Copper Cookware 14 Quart Stocker. I’d like to dive into the difference between broth and stock, speed (fast versus slow), working every last bit of goodness out of food you might have been about to throw away, and how fast metal helps a slow-food technique.
Read to the bottom for my favorite stock recipe — maybe the first to come from a maker of the mission-critical ingredient for any stock — the stock pot.
Broth vs. Stock? Flesh vs. Bone.
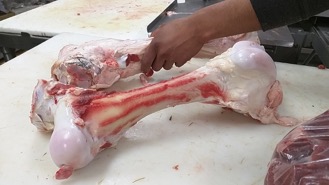
When talking to your Butcher, make sure to get bone all the way out to the joint.
The English word broth is derived of both the old Frankish brouet and German Brühe (“brew”, in this case of meat and aromatics). Bouillon is similar to broth in that it refers, literally, to liquid in which something has been boiled, except that it is generally highly seasoned. Like broth, there’s no bones about it.
Traditionally, broth is used to suspend ingredients as a soup or consumed by itself as a drink. Stock (or, as the French conceive of it, Fond de Cuisine: the “base of cuisine”) is a time-intensive reduction of aromatics, connective tissues, cartilage, perhaps some bits of meat, and bones, resulting in a much thicker, richer “base” on which you can build other preparations, such as sauces.
Recently the two culinary staples have been conflated into “bone broth”. Maybe foodsters are onto something here because this new favorite elixir’s backbone is, in fact, bone. And because bone broth is popularly drunk these days in the traditional way of broth — by itself.
The Three Ts.
Whether you’re brewing meats or bones, the way you get flavor out is basically the same — enough time at a relatively low simmer (time + temperature + turbulence). The critical variables are time and the part of the animal you prefer. Collagens and other proteins in bones take a lot longer to break down under heat and gentle agitation than the muscle proteins in meat. There’s really no way to overcook stock as long as there’s liquid in the pot.
“There’s really no way to overcook stock as long as there’s liquid in the pot.”
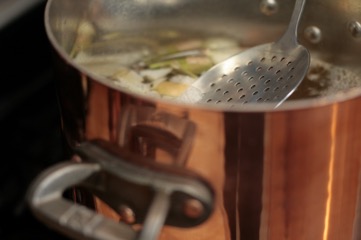
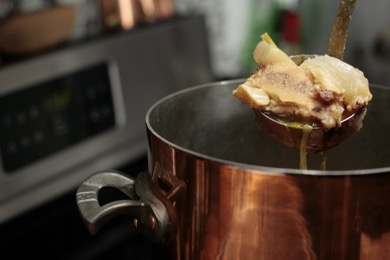
Skim your stock periodically to remove the foam
Even at the lowest simmer, at some point either the full measure of flavor and nutrients will be extracted from your ingredients, or your pot will go dry. While you want to get as close to the former as possible, don’t risk ruining your decoction and damaging your stock pot by reducing it too much. Based on the recipe below, the listed ingredients brewing in 11 quarts of water can comfortably go 12–18 hours (covered at a low simmer) without risk.
Half-a-day later, cartilage will be completely rendered and hard tissues extremely porous and brittle, indicating you’ve gotten about as much out of them as there is to get.
Take it to the max.
The advantage of a classic, heavy copper pot here is that you’ll get the maximum out of your ingredients owing to granular and highly complex distribution of heat channels within the pot. Copper’s heat distribution from the base of a pot is well-known, but honestly, any stock pot of any material will eventually equalize temperature across its floor. For maximum extractive effect, it’s best if the energy can get up off the floor. Solid copper walls quickly walk the energy upward within the metal so that heating of the interior occurs from the sides of the pot as well.
“Solid copper walls quickly walk the energy upward within the metal so that heating of the interior occurs from the sides of the pot as well.”
Aluminum is adept this way too. Stainless steel, not so much — the thermal channels inside stainless steel vessels tend to be simple, vertical convection currents.
Wall heating causes more complex currents within the liquid, deflecting convection patterns and introducing more gentle turbulence. The practical effect of this is fewer eddies (pockets of low turbulence) forming around the solids in your stock. Fewer eddies mean more extraction into the liquid.
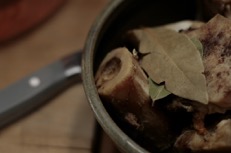
After 12–14 hours of slow cooking, the bones and aromatics contribute rich taste and nutrients to your stock
Go low and slow.
Very low heat and gentle agitation over a very long time teases out layers of flavor and gets as much as possible from your ingredients.
The reliably mellow and rich results of low simmering are owed to the break-down of protein into glutamic acid, one of the key amino acids behind deep umami (savory) flavor. Hard boiling reduces cooking time by driving down fluid volume (not our goal here) while emulsifying fats and proteins, making for a dull, grayish cast and a sapid aftertaste.
Save your scraps
If you’d like to give the stock below a try, just pile up veg scraps in the freezer along with a bone or two (or five) from beef roasts and steaks. That’s all you need, and you’ll be making the most of your provisions.
Roasted aromatics produce darker, more caramelized
tones, while raw vegetables yield sharper, more vegetal effects
If, however, you want the full value of working with bones it’s best to get a joint from your butcher and ask for it to be cut into smaller chunks for you. If you pass them through a hot oven first, fresh bones and joints will produce much more pronounced and complex umami flavor. Leftover bones from roasts don’t require re-roasting, but it certainly won’t hurt them.
I sometimes like roasting my aromatics as well, but it’s a mood thing — doing so does make a marked difference in the resulting stock.
And, although I’m talking primarily about beef bones here, all the above applies equally well to chicken bones (3 — 4 stripped chicken carcasses is approximately equivalent to 1 two-pound beef shank).
Schedule your stock
 I usually call my stock good at about 14–15 hours. I set everything up the night before, bring the whole mass to a boil first thing, simmer it all day and cool (covered, to mitigate spore infiltration) overnight. Once off the heat, the process immediately becomes exothermic in copper (meaning the heat is now higher inside the pot and so it flows to the outside). Energy resistant metals take longer to reverse course.
Like Michael Ruhlman, I don’t worry about bacteria as I’m straining the finished stock into freezer containers — after all, it’s going to be boiled again.
Have fun with this, and congratulations Alchemist! You can now turn scraps destined for the compost bucket into culinary gold.
Scrap Beef Stock
Ingredients for 5–6 quarts finished stock:
- 2 pounds beef shank and joint, chunked
- 1 onion, chunked, plus scraps
- 1 large carrot, chunked, plus scraps
- Handful celery tops and trimmings
- 2 bay leaves
- Optional: a few parsley and/or thyme sprigs
- Between 8 and 11 quarts water (leave yourself about 20% of freeboard in whatever size pot you use)
Method:
Preheat oven to 450℉
Pile bones (and veg, if you like) loosely and lightly on one or more oiled baking sheet(s) and roast 30–40 minutes.
Dump the lot along with the herbs into your stockpot and fill with water to desired level (at least covering your ingredients by 4–5 inches).
As pot comes to temperature, skim any milky foam that rises to the surface (but leave the fat — much of the nutrient value you’re cooking out of these ingredients is fat-soluble).
Once the pot is at a boil, reduce heat to a very low simmer, as close to a “roil” (bubble-less) as you can get. This reduces emulsification of fats, yields clearer stock and preserves fluid volume.
Let cook as long as possible, up to 18 hours covered.